Breakout Season

July 18th, 2019 by Marie Dershem

By Kellen Caldwell

I have a great passion for riding bikes no matter what discipline. I began mountain biking three years ago, and only started road biking a year ago. My first experience racing mountain bikes was in 2017, and my first road race was last year. The first member of Athletic Mentors I met after joining the team was Terry Ritter. Terry has been a huge help with team related questions and he has also provided me with a lot of opportunities to improve my skills.  I met my teammate Dan Yankus last summer. I still remember the first ride we did through Kensington Metropark. During that ride, I learned a lot other cyclists as well as about Team Athletic Mentors’ long history. These rides last summer with Dan made me a better rider both physically and mentally.

Toward the end of last summer, Dan offered to train me. I can’t even explain how much of a difference this has made in my fitness and riding ability. On one of our last training rides together before the cross country season started, Dan and I talked about my goals for the coming season. In the early season, I raced the Barry Roubaix gravel road race. I finished third in my age group. I wanted to make it my goal to win that race in my age group and maybe even over all.
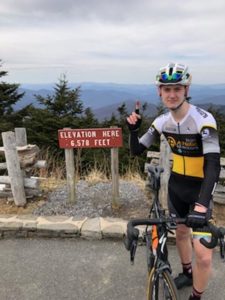
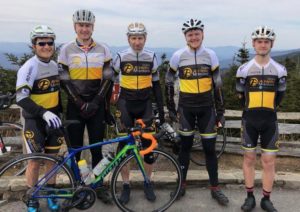
As fall turned to winter, I realized I would have to make the Zwift program my best friend for the next four months if I wanted to achieve my goals at Barry Roubaix. Luckily, I was also blessed with the opportunity to go to North Carolina for the annual team camp. Down in NC, I met Ross DiFalco, Jared Dunham, Bobby Munro, Elaine Sheikh, and a former team member, Scott Hoffner. It was great to go to NC not only because it’s beautiful, but it offered team bonding, quality training, and was much better than sitting on a bike in my basement.

The countdown to Barry Roubaix flew by… and before I knew it, I was at the peak of my training load… at around one hundred and twenty hours of for the off season. After hours of Dan’s workouts and online races, it was finally here: Race week! This week was very stressful for me. I was losing sleep over questions about my competition. When I asked Dan about the race and especially about my contenders, he simply reassured me saying, “You will be fine.” This kind of brought me back down to Earth, and I started thinking about really how much work I had done to get to this point. I thought, if anything bad happens to me at this point, then it is out of my hands.

Then came race day. Me and my family arrived in the beautiful Hastings countryside in the early morning. There was a slight chill and a breeze. I got my number plate, warmed up, and met up with a couple of my teammates. Before I knew it, start time was here. I hurried to the start to get the best spot possible, tried to eye up my competition, but then remembered that it was irrelevant. From here to the end of my race it was just me and my bike, a bond that couldn’t be broken. After standing and waiting for about five minutes I knew who was there and who wasn’t. Thirty seconds till start I said my goodbyes. Then, we were off!
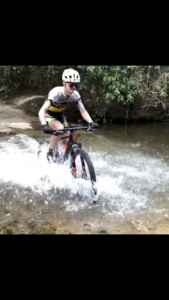
My main focus within the race was to keep track of my competitors and make sure that I didn’t make the same mistake as last year and let one slip away into the cluster of people as they passed by. This time I kept track of them. I tried to stay up front to make sure I would be the first into Sager Road (the gnarly two track section of the course), and luckily I was. A kid my age by the name of Max, a renowned cyclocross rider, got onto Sager right behind me. We came out of there together with our battle scars. Eventually we formed a group of six riders breaking away from the main group. We stayed away for the rest of the race.

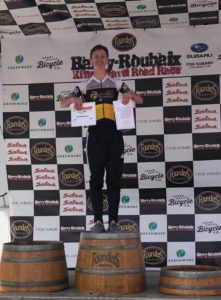
Max was still in the break and he was my only competition left for the top podium spot. We entered the last pavement strip before making our way into town. I sat up front and kept looking back to see if anyone was going to make a move early on, we came up the last hill and we could see the stop light from there. Still up front, and knowing I’m not much of a sprinter, I decided to make the move once we hit the stoplight. We made our way into the final turn “guns a’ blazin’”.  I was mashing my pedals into the ground. In this brief moment before the finish, I thought about how disappointed I’d be to come this far to lose. I poured all my might into that sprint, and at the end of the day, I accomplished my goal. I finished first in the juniors and tenth overall. This was so rewarding.   
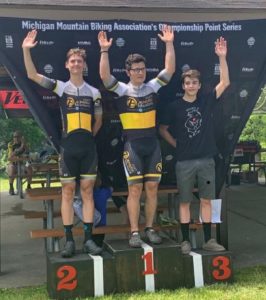
An important lesson we can all learn from this is that it’s important to believe in yourself, but it’s also important to have faith in others. For example, not once did I doubt that the work Dan was having me do was absolutely necessary. Who knows what shape or disadvantage I could have been in if I had not listened to his instruction.

I would like to thank everyone on or off of this team for their contributions to this success: My mom and dad for driving me to these special places beyond southeast Michigan, my teammates for showing me the ropes, Terry for his support, and a special thanks to Dan Yankus for being an awesome coach, mentor, and teammate. I’m excited to see how he can possibly shape me into a better athlete in the future! Also, a big thanks to Cheryl Sherwood for organizing all of the team’s wonderful events! I look forward to the rest of the 2019 season with Athletic Mentors!
The post Breakout Season appeared first on Team Athletic Mentors.


Flat Fix Basics

June 26th, 2019 by Marie Dershem

Flat Tire Basics

Written by Ros Difalco

Nobody wants to think about the possibility of a flat tire while out enjoying time on their bicycle. In reality, if you are going to ride regularly, it’s really more a matter of “when” not “if” when it comes to flatting. So, when you do get a flat, you have a few options. First, you can annoy your friends and family and get a ride back to your house. Second, you can walk (from experience, probably not a great option!). Third is your best shot: FIX THE FLAT WHILE ON THE ROAD!

Let’s go over the things you should carry while riding to fix most flats. There are different ways people carry the necessities, but here are my recommendations.

First, carry a saddlebag. Many people like to stash their change kits in their jersey pockets, but I prefer the saddlebag. If I have to stock my back pockets each ride I am likely to forget something or leave something out due to laziness.


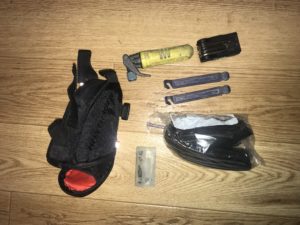
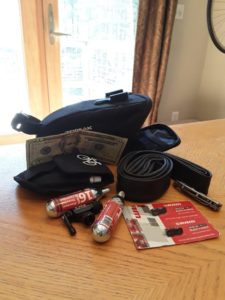
In your saddlebag you should carry a

  1. spare tube (the correct specifications to match your tire width, wheel diameter, and rim depth). I like to keep the spare tube wrapped up in a plastic bag to prevent it from getting holes while rubbing against tools.
  2. 1-2 tire levers. Not being able to get a tire on or off is extremely frustrating.
  3. C02 inflator (2 of these, just in case the first doesn’t go to plan).
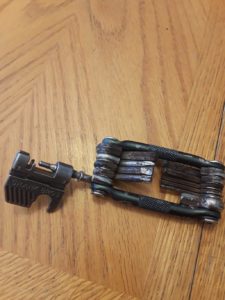
  4. Multi-tool (though you don’t need it for the tire fix)
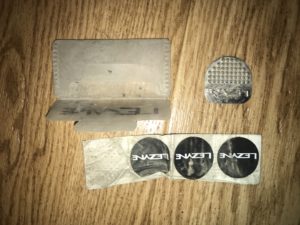
  5. Optional: There’s a new thing I have been adding to my saddlebags the last few years. A few brands make stickers to patch holes in tubes. DISCLAIMER: these should be used as a last resort if your spare tube is punctured or if you get a double flat (two flat tires in one ride).

Now let’s get on to your flat tire! In our hypothetical situation, you are riding down the road when you feel the tell tale squirmy/squishy ride characteristics of a flat tire. Now you might be tempted to keep riding but please don’t! Pull over somewhere off the road and check the tire for air pressure. You don’t want to damage your rim by riding with a flat tire.

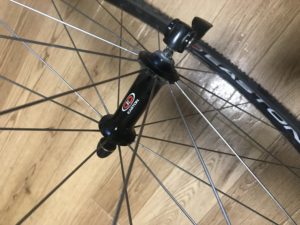
Fixing a flat tire requires that you remove your wheel from the bike. Most bikes have a quick release axle, but if your bike doesn’t, make sure to carry the tools to remove your wheel. You also need to know how to open up brake pads on many bikes to get the tire to fit but we won’t cover that topic here due to the various types of brakes.

Now that your wheel is removed, you need to make sure the tube is fully deflated. This is good time to explain that most bikes have both a tire and a tube. The tube is what holds the air in the tire. The tube is what we want to replace/patch. To get to the tube we must remove the tire. Tires may be stuck to the rim via the bead.

Using your hands, push the tire to the center of the rim bed. Do this all the way around the rim. Getting the tire to the center will give you the space to get the tire over the lip of the rim. Once the tire is moved to the center of the rim, get your tire levers. Pry the tire over the rim. Only pry one side of the tire off of the rim. Now you should be able to remove the tube from the rim.

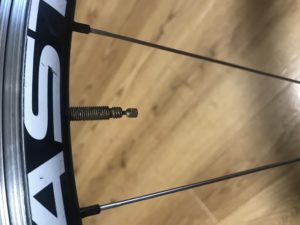
Next, look at the tube and see if you can determine what punctured it. You also want to GENTLY run your fingers in the inside of the tire to make sure there aren’t any thorns or objects stuck in it. If you install your new tube with a thorn in your tire you will instantly get another flat. Now, unwrap your tube and put the valve through the valve hole on the rim and lay the tube around the diameter of the tire. We now have to get the tire back on without puncturing the tube. With your hands, work the tire back on the rim until can no longer go further. At this point, get your tire levers back out. You need to pry the tire the rest of the way on the rim. BE SUPER CARFUL NOT TO PINCH THE TUBE WHILE DOING THIS!

Now that the tire is back on the rim, it’s time to inflate it and get riding again. Tighten the C02 on the inflator to break the seal. Make sure the valve on the tube is open and press the inflator firmly against the valve and release the compressed air. It will feel very cold but do not let off until the C02 is empty. Your tire should now be full of air! Make sure to tighten the valve on the tube. At this point you can put your wheel back on your bike and tighten up your axle.

Before closing, here are a few pieces of advice I would give to avoid getting flats in the first place. Use a quality tire that is up to the riding you are planning. I have made this mistake and the right tire makes all the difference. It’s also worth noting that when a tire gets worn out its puncture resistance is greatly reduced. Cheap tubes can be the cause of flat tires when the valve stem becomes unbounded from the rubber so decent tubes are important. If your bike setup allows it, going tubeless with sealant can offer a more trouble free ride as well. Whatever you decide to use, get familiar with your bike and be prepared for any flats you may encounter.

The post Flat Fix Basics appeared first on Team Athletic Mentors.


Top 5 Things Learned at This Year’s Training Camp

June 6th, 2019 by Marie Dershem

Written by Terry Ritter

This season’s North Carolina Training Camp had great weather and terrific riding. There was a newer rider flare to this edition, with ’19 team additions Ross DiFalco and Jared Dunham joining myself and fellow seasoned Team Athletic Mentor riders Elaine Sheikh, Bobby Munro, and Kellen Caldwell. Dan Caldwell, Kellen’s father, also spent part of the week with us, and Scott Hoffner made his usually trip up from Winston Salem to ride for a few days.  Second year team rider Tim Coffey attends Brevard College and got a chance to log about an hour with a few of us before some bad luck changed his preseason.

Though this marked the 19th time in the last 21 years I’ve put together a cycling excursion to jump start the season, I am always entertained by the new things I learn (or relearned) each year. Here’s my top five list from this year.

Tubeless tires require different attention in the off-season…

 Last season I mounted up some tubeless tires and sealant and enjoy the benefits of that set up for training. However, I didn’t give much thought to how I’d store these hoops over the winter, just hanging them like my tubed arrangements of the past. The first road ride of the trip happened to be the Mt. Mitchell ascent, an 87 mile day with over 9000 feet of climbing. The first time the bike rolled over 25 mph I noted an imbalance in the front wheel. After checking the bead and seeing it was seated appropriately, my brain started working on what the issue could be. That’s when I remembered I had to pump the tire up as I noticed it had deflated to the degree the bead had lost the airtight seal over the winter. I quickly speculated the air had dried out the sealant, which had collected in the bottom of the tire as it hung, and was now a solid, non-movable mass throwing things off. This was confirmed once I got the tire off and had an 8 cm strip of solid sealant affixed to one side of the tire. Removing this and remounting the tire with new sealant solved the hop. From here on out I’ll be removing sealant from my tires before I mount them for off season storage (though you could just keep them aired up to stay sealed as well).

Simple Math…

 After hitting the Parkway and descending down 215, we came to a stop and discovered Jared’s crank was coming loose. It had been creaking for 2 hours. Unfortunately, his crank bolt was a 10mm, and none of our multi-tools had anything bigger than an 8mm. That’s when I remember a trick Dan Yankus taught me at the ’16 camp. We took one of the multi-tools apart to get the 6 and 4mm allen wrenches free, then placed them side-by-side in the bolt head (6 + 4 = 10mm). We then used one of the other tools 8mm to fit into the loop of the paired allens and twisted it till the bolt was sufficiently tight to get us home.

Technology is great if you know how to use it…

 At our ’17 camp, Kaitlyn Patterson was able to construct a route within DuPont State Forest from a friend’s map, and then download that to her Garmin. She shared that route with me last year when she wasn’t able to attend and we followed the 3 hour tour without issue. This year was not as successful, as I led us around for about 90 mins before we ended up back near the finish. Seems I didn’t realize the Garmin has a turn-by-turn arrow that will let me know where I’m supposed to be heading when my screen shows route crossing over themselves. Later in the week I figured this out and we tried the route again, with it working flawlessly.

 Would you like that spoke straight or curved…

 As we rode up Mt. Mitchell, my rear Giant wheel broke its first spoke (4 years of riding on it). The DT Swiss rim stayed pretty true and I didn’t have any issues finish the ride. However, I didn’t have any of the straight pull replacements (nor did any of the local shops). A little brainstorming had Ross, Jared and I using the gas stove to warm the spoke (actually, it had to glow) and then used a couple of pairs of needle-nose pliers to straighten a J bend from a conventional spoke I did have. Unfortunately, the spoke was still too short to use, but it gave me a potential emergency option if I have this challenge in the future.

Being prepared means less stress…

 I’ve preached this to all my camp attendees each year. However, this season things got away from me as I was getting ready for camp (Jared, Ross and I took my vehicle) and so decided I’d need to do a little work when I got down to NC. This could well have been fine until some unexpected things happened (spoke, tire sealant), and also unexpected time to help others. I ended up being a bit too busy to really relax as much and recover as much as I should have. My teammates were gracious with their patience, but this was my own fault and something I would have helped entirely if I’d gotten everything done on my equipment at home before I pointed my van south.

These trips are always a lot of fun. We get some great training in, enjoy some relaxation, learn about our new teammates, and pick up some additional wisdom. It makes me wonder what I’ll learn next year.


The post Top 5 Things Learned at This Year’s Training Camp appeared first on Team Athletic Mentors.


Packing your saddlebag

May 2nd, 2019 by Marie Dershem
Written by Jared Dunham If you’ve never had the privilege to be in the middle of the rain with a flat tire, and your last CO2 canister just leaked out, then you can’t truly appreciate having the proper tools fix a mechanical issue. Accidents on the trail will happen, and the only way to deal with these is to bring the right tools/supplies with you. The best place to store all the tools needed for your bike to survive hours of singletrack is in a saddlebag. The amount of equipment you bring in the bag is determined by the time/distance your covering. Let’s look over a few things that you should be including in your saddlebag before you go out adventuring. Before we begin, the 3 durations we’re going to be considering for packing tools are:
  • Short Rides (Under 2 hour ride)
  • Medium Rides (2 to 5 hour ride)
  • Long Rides (5 to 10 hour ride)
Master link
  • Why should I bring it? They are generally the part of the chain that snaps when it breaks due to pressure.
  • Recommended Amount
    • Short Rides: 1
    • Medium Rides: 2
    • Long Rides: 3+
  • Notes
    • Not all are re-usable, you might be able to take them on and off the bike, but they will not stay strong
    • Can be easily packed
Multi-tool
  • Why should I bring it? The Multi-tool exists to do any basic repairs or calibrations you need done on the trail.
  • Recommended Amount: Any Ride: 1
  • Notes
    • Make sure the multi-tool has a chain breaker, it will be one of the only things you can use to get your chain apart on the trail.
Spare Tube
  • Why should I bring it? In case you get a tire puncture from all sorts of sharp objects.
  • Recommended Amount
    • Short Rides: 1
    • Medium Rides: 1
    • Long Rides: 2
  • Notes
    • You can zip-tie a tube to the back of your seat when racing.
    • If you have “deep” rims make sure that the valve stem of the spare tube is long.
    • zip ties, rubber bands, plastic sandwich wrap, or tinfoil to keep the tube wrapped tight.
CO2 Bike Inflator or Mini Pump
  • Why should I bring it? These devices are used to refill a fresh tube or one that has just been patched.
  • Recommended Amount
    • Short Rides: 1 pump or
    • Medium Rides: 1 pump or 2 CO2 Canisters
    • Long Rides: 1 pump or 3+ CO2 Canisters
  • Notes
    • CO2 Bike inflators have a learning curve.
    • Some mini-pumps come with mounts that allow them to be attached near a water bottle cage.
    • If you mount the mini-pump, cover the nozzle from dirt and mud.
    • Mini-pumps take A LOT longer to fill a tube.
Cash
  • Why should I bring it? If your exhausted at a gas station it might save you from being forced to pawn off your bike for a ham sandwich.
  • Recommended Amount
    • Short Rides: None
    • Medium Rides: $20
    • Long Rides: $20
  • Notes
    • Can be used to temporarily fill a gash in the sidewall of a tire.
Tire Patch Kit
  • Why should I bring it? In case all your tubes are punctured.
  • Recommended Amount
    • Short Rides: None
    • Medium Rides: 1
    • Long Rides: 1
  • Notes
    • Get tire patches that require glue for use.
    • Make sure the patch kit includes tire levers.
Other Ideas for Trail Bag:
  •  Zip Ties
  • Packaged Rain Poncho
  • Meat Tenderizer
  • Fire Starter Kit
  • Miniature Knife
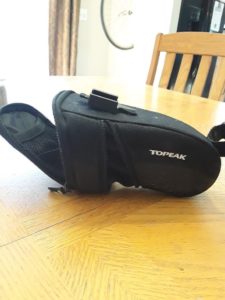
For the pack itself, I’ve recently been using a Topeak “Aero Wedge Pack w/ Fixer”. The bag is capable of fitting everything you’ll need and more. Something great about it is the “Fixer”, which is a piece that mounts to the bottom of the seat instead of relying on straps to hold the bag. I read on thetrajet.com that, no matter what you’re using to carry tools it’s always important to pack enough for the time you’re riding and the pathway conditions you’re faced with. Hopefully this helps a little bit when you’re considering what to bring with you on your trail travels.     The post Packing your saddlebag appeared first on Team Athletic Mentors.

How to bring your bike from a muddy mess to race ready in 30 minutes (or less?!)

March 20th, 2019 by Marie Dershem

Written by Bobby Munro

Cyclocross and wet gravel grinders are not kind to someone who likes a clean bike. If you cannot stand to have anything other than a well-oiled machine here is a step by step process to do it quickly. It won’t be perfect, but it will be close enough.

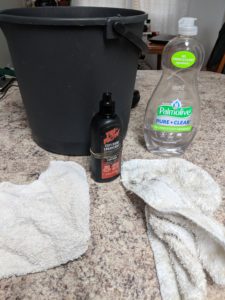
Tools:
Hose (A bucket can be used but this will slow you down)
Bucket
2 Rags
Dish soap
Chain lube

Step 1: Hose down
Go outside and blast that grit away! Don’t forget to hit your pads (disc or rim). Also pay attention to your rims (especially with rim brakes). This is also the time to blast as much crud out of your chain as possible. While spinning the crank backwards, blast your hose downward over the chain. This is the best way to get a lot of grit off your chain. There are a few “Chain washing machines” (like the park tools CM-25) on the market that work OK but high pressure seems to do a good job as well. It is also a lot faster.

Step 2: Soap
Fill your bucket with water and dish soap. Use one of your rags to wipe the bike down. Get into all those nooks and crannies. I like to do a little intermediate rinsing to make sure I am getting everything. Save the chain for last as this will get grease on the rag that will wipe off on your frame.

Step 3: Rinse
Rinse the bike with the hose. If you only have a bucket, then this will take a bit longer. It usually helps to not use too much soap in step 2.

Step 4: Dry
Admittedly you could skip this step. But since you are already out there you might as well do it. Use your second (clean and dry) rag to dry off the bike. It is usually worth it to add a little elbow grease in a few spots. Save the chain for last for the same reason as earlier. Your goal is to get your chain as dry as possible.

Step 5: Lube
Now that you blasted all the lube out of your chain, it needs to be replaced. Go a little heavy then wipe off excess. You can use the “dry” rag if it is indeed still dry. Otherwise you will need a third. Paper towel works. But try to stick to washable rags when possible. It is also advisable to hit all the moving parts of your derailleurs and brakes. You should also try to get some lube inside the jockey wheel cups if you do not have sealed bearings.

Step 6: Ride! And know that a clean happy bike is only 30min away.

The post How to bring your bike from a muddy mess to race ready in 30 minutes (or less?!) appeared first on Team Athletic Mentors.


Traumatic Injury Life Saving Tips

March 8th, 2019 by Marie Dershem
Written by Dawn Hinz Sadly it seems there are more car versus cyclist accidents. In 2006, 772 people were fatally injured in cycling accidents. Where as in 2016, that number was up to 840; including 5 local cyclists. (NHTSA Traffic Safety Facts) We do everything we can as a cyclist to minimize the danger. We wear bright clothes, our bikes look like Christmas trees and most importantly, we follow the rules of the road. Unfortunately that doesn’t guarantee that we aren’t seriously injured. What should you do if tragedy strikes you or your group? The personal injury lawyers help up to an extent but hiring the right one is important.
  • Everyone should carry a cell phone on their body. I do not agree with keeping your phone in a bag on your bike. If you are thrown from your bike you may not be able to reach your phone.
  • KNOW WHERE YOU ARE. You should know your route and where you are along that route. This way when you call 911, emergency personnel can find you as quickly as possible, when every minute counts. Go one step further and set up an activity tracker that relays your location to a reliable person who is not a part of the ride. This way they get a notification if you stop moving and can call for help.
  • Know how many people are in your group. 911 will need to know how many patients need an ambulance. Then, go help your friends. You should know any help you render will be covered under Michigan’s Good Samaritan Act (MCL 691.1501). This law, as mentioned by this important site, basically states that a volunteer trying to help someone cannot be held liable if those actions cause further injury; excepting gross negligence.
  • Do not move someone unless the location causes further danger or harm. I.e. Perhaps you need to slide someone off the road if traffic is not slowing down or giving you space.
  • Do not unnecessarily adjust the patient’s head. If you hear snoring, gurgling or no breaths then gently place the head in a “sniffing” position.
  • If you see blood, control the bleeding with direct and continuous pressure. Put your hand or hands over the wound and keep pressure on the wound until help arrives. Every red blood cell counts.
  • If it is cold or even slightly chilly outside keep the patient warm if possible. Hypothermia causes shivering which wastes precious ATP. Even slight hypothermia will worsen a trauma patient’s outcome. Give them your jacket or get blankets from bystanders.
With these actions you have given your friends a fighting chance in the Emergency Room. If you would like to take it one step further then it is time to find a first aid training online and CPR class. Stay safe out there. The post Traumatic Injury Life Saving Tips appeared first on Team Athletic Mentors.

The unexpected Ironman: a race story

December 11th, 2018 by Marie Dershem

Written by Raquel Torres

I write this with the intent to share my story, passion, efforts, obstacles, high and lows. My hope is to inspire others to fight for their dreams; to be better at whatever they love and in all areas of life.

Though I do not have the space here to write my life’s story, you’ll have to trust me that I have a million and one excuses that anyone could use to renounce my dreams. Maybe someday, I will write an autobiography of my crazy life, but that is for another time. So, today, I start with the decision to do a Full Ironman.

My coach, Mark Olson, has been telling me for a few years now that I should consider racing a full Ironman. But, because my life is a bit complex a few moves, job changes, parental responsibilities, sponsor commitments, and other sports opportunities) my goals have mostly been based on opportunities that arise as I go along. After a few very challenging years, competing as Elite and professional, this 2018, I had decided to take some time and compete at the age group level and in local events. During the summer, I had the honor to be asked by the Dominican Triathlon Federation to compete in a World Cup in Huatulco, Mexico and a Pan American Cup in Quebec, Canada.

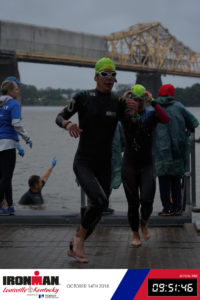
With a little less pressure and some other changes happening in my life, I felt that the timing was right to try a Full Ironman. Together with my coach, we decided to start training for an event, which I would do as part of the Athletic mentors’ team. Long story short, I received a few work related opportunities in coaching so my daughter Chantal and our dog Phoenix moved to Virginia, that decision was 8 weeks before the event, a full Ironman, so we looked for an event that was near our new home and found the Ironman Maryland event that was in 8 weeks. I signed up and made plans with some friends that had also registered for the event and I was happy with the challenge. Two days before the Race I was contacted by the Ironman race staff to let me know that due to my status as an Elite ITU competitor, the rules did not allow me to compete in the Maryland event as an Age Group competitor, and the event did not have a Pro category. After several e-mails and phone calls between my coach and the event referees, they signed me up for the event in two weeks, the Ironman in Louisville, where there was a Pro category.

Honestly, this situation made me loose concentration; it was a shock, as I had decided not to compete as Professional in a full Ironman competition. I felt that I did not have the condition or support to be competitive at that level; at least at this moment in my life. I realized, however, that I needed to concentrate on what I could control, which was to prepare all of the logistics (my parental responsibilities, work commitments, packing all necessities, shipping the bike, etc.) to get ready to be at that starting line in 2 weeks.

The strategy changed in all aspects, as I was planning to drive to the event in Maryland and I had almost everything packed. I had to now find a plane ticket, bike transportation and my home responsibilities. I focused on giving priority to each item, while keeping up with the training as best as possible for the next two weeks.

Race Week:

When I arrived in Louisville the climate took a big turn and it became windy, rainy and cold. Neither I nor anyone had come prepared for the weather that was going to be on event day. I concentrated in finding what I was going to need the next day to deal with the weather conditions. I went to the Ironman Village and was only able to find a small winter hat; they had sold out of everything. They suggested a store that was about 6 miles away and they said it had gloves and other gear. Since I had not been able to train, I rode my bike to the store as I figured 12 miles would do great for my metabolism. Luckily, my coach and others from Athletic Mentos let me borrow special gear for the cold temperatures and for the rain conditions.

That afternoon, I had a beer with them, had a salmon sandwich and later spent the rest of the afternoon preparing my nutrition for the Ironman. I dined on light pasta, a cup of tea and off to sleep.

Race Day:

5:00 AM – I placed my numbers on me, drank a coffee, went down to the hotel lobby to eat breakfast a bagel with peanut butter. It was raining HARD, so then I decided to wear my wetsuit and walk warmer to the transition area, it was cold, dark and rainy.

6:00 AM – It was a bit uncomfortable to prepare the transition and to walk from T1 to the start of the swim, approximately 2 KM away. There were so many people walking, saying “we are signed up for this so let’s have fun and do our best!”

7:30 AM – When the race was about to start, they announce that the swim start will be delayed while they adjust the buoys as the weather and the currents are not apt for the race as initially planned. They announced that the swim will be done in a different direction and that it will be, .09 Miles shorter and it will start 30 minutes later.

Swimming 3.86 KM

Dark, raining and cold, I was very calm, as I had prepared mentally to stay calm no matter what happens. My coach Mark and Coach Cricket stayed with me in the start area, I was able to stay warm and they even gave me hot handbags, which helped my more psychologically than physically. I had already decided to take the swim part of the race as a warm up as this was my first Ironman and I had no idea what I was doing. My goal was to be conservative and concentrate on nutrition and mental state.

It was a water start and the currents were strong, and you could not see absolutely nothing. This gave me even more reason to take it slow and try to tail someone to be able to reach the markers. Because of the rain, the water smelled terrible and I could not wait to get out of the water.

T1 (Transition #1 Swimming to Bike).

When I got to the transition I decided to use the people that help you strip off the wetsuit, it was something I was not planning to do, but they could not take it off … so I lost a minute or so. The volunteers were very friendly as they helped you find your gear and to prepare, as I was arriving I said out laod …”Raquel Take your Time.” I had improvised what I was going to wear for the 180 KM with such low temperatures  and the rain. I wore gloves, a winter cap, two cycling scarfs a winter jersey and a raincoat. I ran barefoot as my biking shoes were attached to the pedals and I  carried my socks in my hands, when I reached the mounting area (600 Meters) I put on my socks and mounted the bike.

Cycling 180.25 KM

The bike was the hardest part and challenging of the event. First, I noticed that my Powermeter was not calibrated. I tried (with gloves) to fix it and it was even worse as the screens kept moving as it is a touchscreen system and it was so cold that my fingers where frozen and having gloves made it impossible to adjust the screens. After about 10 KM trying, I gave up and said to myself “Raquel, just go for it”. The first 40 KM was super cold, I did warm up later and was able to take off the raincoat and was able to hand it to a volunteer (avoiding penalties).

I saw 4 deer that crossed right in front of me and it was beautiful, I was focusing on the views and as I could not see how fast I was going nor my power output, I placed attention to the time and distance so I decided that every ten minutes I would drink some nutrition and anytime I had a negative thought, another drink!

About 100 KM mark my bike chain came off and was able to replace in less than one minute, then the second time the chain came off, same result, then the 3rd time the chain got stuck real hard and luckily I had gloves on was able to pull as hard as I could and got it out. I remained positive and said to myself “Raquel, this is what it takes, keep going and focus!”

Without a doubt, the hardest part was the last 20 KM as I was so tired of being in the aero position and my neck and back really hurt. I was counting each second, but kept focusing on the moment, not what was coming ahead.


T2 Transition Bike – Marathon

This is when I said to the volunteer….”Now a Marathon?” She smiled. I sat down and removed my clothing slowly, I stretched my back and took my time as I wanted to be ready to feel the best possible way and take my nutrition to the marathon.

Marathon 42.20 KM

During the run, I was impressed how well I felt. It was as if my body had forgotten that I already had 7 hours in action. The first 10K my job was not to go too fast as I felt better than what I would have imagined. So, my mantra was “Raquel, keep in the zone” and I did; taking small sips of my nutrition often. After 20 KM, I was starting to feel the pain and noticed that my pace was starting to slow down, I then changed my mantra to “keep mental focus and the pace, breathing and form.”

Watching the people on the streets, the music, enjoying the people as they greeted me, I focused on the smells, homes that smelled of fresh laundry, and kept thinking “I wish I was there drinking coffee and doing Laundry.” It’s funny the things that go through your mind when you are pushing yourself so hard.

There was a hippie on a bike with music, another person playing a harmonica during both running laps, another guy that was yelling very loud, “If it was easy everyone could do it.” When I got to the first lap 21KM, my coach yells, “You need to be tough now!” I thought…..”Now Tough?”

The last 10 KM were hard. I could feel the challenge physically and mentally so I kept saying to myself motivational things “Raquel only 10 KM which is nothing for you” Later, Raquel, a simple 5K, you made it keep going!”

The finish was a culmination of emotions, I was happy, tired (mentally and physically), I believe more because of the event challenge then for the physical demands and resistance. I laughed, cried, laughed again and then I finished.

The post The unexpected Ironman: a race story appeared first on Team Athletic Mentors.


Christmas “wish list” for your favorite triathlete (even if that is you)

December 6th, 2018 by Marie Dershem

By JoAnne Cranson

All I want for Christmas is some Triathlon Equipment……

But the problem is, I’m new to this sport and don’t know what the “best – tried and true” equipment is.  So…. I went to my teammates at Athletic Mentors to utilize their experience and knowledge to figure this out. Together, we came up with a great “wish list” of suggestions for your favorite triathlete (or yourself)!

For Swimming:

Goggles:  I got a lot of different feedback so this tells me it depends on your face shape and this may be trial and error

  • Kayenne Goggles – Smoke Lens for bright sunlight in open water.
  • Speedo Vanquisher 2 is good.
  • Speedo Jr. Hydrospec for a smaller face shap3
  • Roka R1 – amber colored makes the buoys much easier to see in open water

Wetsuit:

  • Aquaman brand is the clear winner. There are many different makes, so it’s based on your budget, but ones like Bionik, ART, or whatever you can afford, you won’t regret it.  They have some good sales too.  This is a local Michigan business where you can try on the suit for an accurate fit which is very important!

Tri-Suit:

  • A one-piece suit seems to be the preference, it’s easier to keep in place. But if you are just starting and want to go with a shirt and shorts you would want to look for specific “tri” shorts, not normal biking shorts.
  • Biking shorts have too much padding and are not comfortable to do the run or swim in. It needs to be comfortable, have adequate movement, and dry quickly.

Other items that will help you in training:

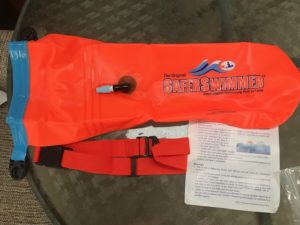
  • Super Important in Open water swimming – Safety Buoy – Safer Swimmer Float attaches to your waist, has a dry bag you can put valuables in, bright orange so people see you and in emergency you use as a flotation device.
  • FINIS paddles for proper stroke practice and Sporti Training swim fins.
  • Body Glide to apply to avoid chafing (perfect stocking stuffer)

Biking:

 Helmet: If you want a helmet for road riding, a Smith MIPS helmet is great.  There are also specific TT helmets, but those are only used when riding a triathlon bike and offer less wind resistance than a typical road helmet.

  • Bike: It depends on what type(s) of biking you will be doing.  If you are just beginning and want a more versatile bike that you can go to group rides and ride on paved trails, you should purchase a road bike.  I good entry level road bike would be the Giant Contend.  Giant TCR is an all-around road bike or you can move up to a Giant Propel – aero road bike.  There are lots of used bikes on local website ads to get you started too.  Most Triathlon’s have the bikes on paved roads, so to help you go faster ideally you want smooth tires – 25 cm – 28 cm.  You can purchase clip-on aero bars once you are very comfortable riding.  For aero bars, you want to get them as “flat” as you can to lower wind resistance and the lighter the bars the better.  If just triathlon racing and not group riding, you could get a triathlon bike, like a Giant Trinity Advanced.  But, you can’t ride a triathlon bike in a group. It is just not safe.
  • Biking Shoes with Cleats: These are a little tricky to start using but they are super effective in utilizing your pedaling strength the whole way around the pedal, instead of, just pushing down.  For the shoes, there are specific shoes for tri events.  The main thing I’ve learned is you want shoes with just “velcro” closures.  The other types of shoes take too long to put on, secure the closures, and take back off again.  Remember, focus is to save time in transition.  The feedback I got on the cleats is “look” type pedals. They give your foot a big base for improved power transfer, and as a result, helps you go faster!
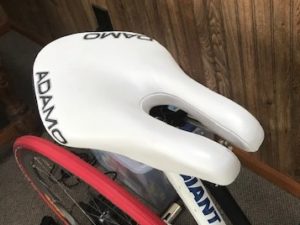
  • Bike Seat – this is difficult because everybody has different “sensitivity” pressure points. A good place to start would be the Adamo, the Infinity or other seats with “cut-outs.”
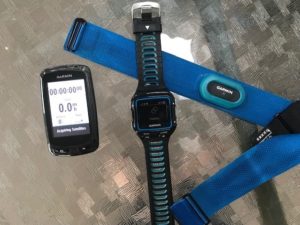
  • Bike Computer: This is optional – If you have a running watch that can also track bike speed and other details, you may not need a bike computer.  If a bike computer is wanted, Garmin 520 is our team’s top choice.  It will also upload course routes, so you have turn by turn directions!  If you are limited on a budget, there are other lower priced Garmin computers on the market that will give you mileage, speed, etc
  • Water bottle – If you are just getting started, use bottle cages for your water bottles. As you get into using aero-bars or a tri-bike, ideally you don’t want to get out of that aero position to get a drink.  One option is Xlab Torpedo Versa – easy to drink from, refill and easily attachable.  Another one is Speedfil Inviscid.

Another item that is really neat is the Bontrager Speed Concept Speed Box II.  It attaches to your top tube bar and allows you to store gels and nutrition that is easily accessible.

A few other miscellaneous, Biking Items include:

  • Underseat bag to carry tire levers, spare tube and CO2 canister;
  • Fluid Trainer or Smart Trainer for indoor training;
  • “Chamois Butt’r” cream to apply to pressure points areas or, for the ladies, Hoo Ha Ride Glide.

Running:

  • Shoes: Good Quality is most important.  Go to a specialty sports store like Striders, Playmakers, or Gazelle Sports where they fit you personally and even allow you to run on a treadmill in the shoes.  Shoes are not something to go cheap on.  They are key to getting your feet, knees, and hips “happy” when you are running.  Some brands to consider are Hoka, Asics, or Nike Structures.
  • Triathlon – Running Watch. Most popular is the Garmin 920XT.  A great accessory for the Garmin 920XT is the water-proof heart rate strap you can wear in the water and throughout the race.  The Garmin 920 tracks all aspects of your race, even transition times!  There are also many screen display options to choose from.  It is great for training as it can track your indoor swims or open water swims, indoor or outdoor runs, plus your biking stats too.  If you want to look into other watch option, some teammates use Garmin models like Vivoactive 3 or Fenix.
  • Sunglasses – Hats: Smith sports sunglasses are the best option.  Other suggestions are using a ball cap or sun visor during your run.

A few other miscellaneous Running Items include:

  • Race Number belt – to strap around your waist and pin your number on;
  • Foxelli USB Rechargeable Headlamp – create for early morning or late night runs;
  • Reflective Vest with Lights – creates good visibility for safety in training;
  • Stryd – run power meter

Stocking Stuffer:  Elastic Laces – for sliding on your running shoes, like Lock Laces

There are a number of local bike shops that have a lot of these items for you to see in person, try-on and get their opinions.  Check out Speed Merchants Bike Shop, KLM Bike & Fitness, or Custer Cyclery.  For swimming items, check out swimoutlet.com.

It has been fun compiling this list and I’ve learned I want even more items than I thought!  I hope this will be a good resource for you too.  I encourage you to make it your goal to do a triathlon.  You don’t need to have all these items, just get out and “tri” it.  You will learn what you really need and can gradually accumulate the additional tools.


The post Christmas “wish list” for your favorite triathlete (even if that is you) appeared first on Team Athletic Mentors.


2018 USAT Age Group National Championship Race Report

December 2nd, 2018 by Marie Dershem

Written by Brian Reynolds

The 2018 USAT Age Group National Championship took place in Cleveland, Ohio this year.  The olympic distance event was an “A” race for me. After an off-season of working hard on improving my swim and a summer filled with great training sessions, some fast new equipment, and improvements in every discipline, I was ready and excited to peak for my “A” race.  I was excited to race because my summer training was going really well.

Here is how my day unfolded at Nationals on August 12th, 2018.

Swim

The drama before the swim was waiting to find out if the swim was going to be wetsuit legal. The day before the water temp was 78.5 deg F and the wetsuit cutoff is 78 deg F so it was going to be a close call race morning.  On race morning the water temp was 75.8 so it was wetsuit legal! I was happy it was wetsuit legal because it would help neutralize the advantage to the strong swimmers. There were a fair amount of waves in Lake Erie, which made it a tough swim.

I started in the first wave, which was helpful because I knew who was ahead of me in my age group.  In past events, I’ve started later and never had a good sense of where I was compared to my competition.

My plan for the swim was to get out strong and try to catch the draft behind the strong swimmers.  However during the race it was very difficult to stay on anyone’s feet for more than a few seconds without getting pushed off course by the waves.  I was working harder during this swim than any other swim this year. It didn’t help that the swim was around 200 to 300 yards long. Although it felt like I was giving up a lot of time to the leader, I was only 1:10 minutes down from the leader. This was the closest I’ve been to the leader coming out of the swim at Nationals. I was in 17th pace after the swim.

T1: Swim to bike

The swim to bike transition was long.  It was roughly a 300 yard run from the lake-shore to transition. I had a smooth transition besides my helmet visor being super foggy.

Bike

When I got onto the bike my legs were feeling good and I was able to get up to power quickly.  I passed 8 riders within the first 2 miles of the race. After passing the riders, I could see the flashing lights of the motorcycle pacing the two leaders.  I used the motorcycle as my carrot to chase. I was quickly making up time on the leaders. By mile 5 I ca

ught up to the leaders. At this point I was excited because I’ve never been this close to the lead at a USAT nationals event.

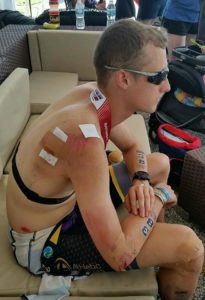
I had to wait before passing the leaders because there was a sharp right hand turn.  As I made the turn I noticed that the road surface was very rough. There were several tare strips going across the road which prevented me from taking a more aggressive line into the turn.  Instead I took a wide sweeping turn to help keep my bike under control. Unfortunately I ran out of pavement and my front wheel hit the curb in the middle of the road. I landed on my right side and skidded across the pavement.  I had cuts on my elbow, hip, and hand. I would also find out later that I had bruised my rib and had a big dent in my helmet. A race volunteer ran up to me asking for my name and what event I was in to make sure I didn’t get a concussion.

My day went from an ultra high feeling of being with the race leaders to an ultra low feeling of being on the ground bruised and banged up.  At first the crash didn’t feel real because a month prior I had crashed my bike during the Tri Del Sol race.  I couldn’t believe that I crashed again!  As I laid on the ground I thought about dropping out and calling it quits. But after thinking about it for second I picked up my bike, re-positioned my dropped chain, fixed my helmet, and I got on my bike.

For the remainder of the ride I felt discomfort in my right shoulder area with every breath I took. I wasn’t able to ride at the same power prior to the crash, riding at 75% of my full capacity. Although frustrating, I knew that all I could do was give it my best effort. Even with the crash, I was still able to post my fastest bike split for a USAT Nationals event. My hard training had paid off.. I was in 8th place after the bike.


T2: Bike to run

My T2 transition was not as smooth as T1.  Coming off the bike my shoe fell off the pedal so I had to go back and pick it up.  As I ran through transition and picked up my run gear I was starting to notice more discomfort in my right shoulder.

Run

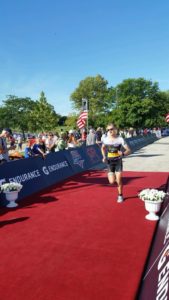
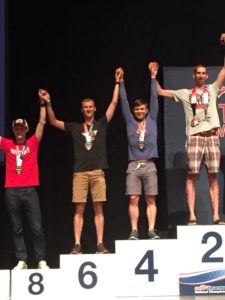
When I started running, my form was off due to lack of mobility in my right shoulder due to pain.  I was running 20-30 secs slower than my typical race pace and at  this point I was in 8th place. It took about 2 miles until I was able to settle into a descent run rhythm.  I wasn’t feeling too fatigued during the run since I wasn’t able to push myself to my full capacity. Thankfully I was able to run the 2nd half faster and picked up a few places to finish 6th in my age group.  I was proud of myself for finishing the race let alone finishing in the top 10. However, I was still bummed about not having the performance that I was capable.

If there was a silver-lining I can takeaway from this race it’s that unexpected things can happen to disrupt your race.  However, when the unexpected happens it’s your attitude that will dictate how much of an impact it will have on your race. A good attitude will go a long way especially, when you need to adjust your race plan and expectations.  During this race I was saying to myself “it’ll be pretty cool if I could still finished in the top 10” and I did! I still had something to chase and keep me mentally engaged during the race. At my next race my goal is to keep the rubber side down and that will be a win in my books.

The post 2018 USAT Age Group National Championship Race Report appeared first on Team Athletic Mentors.


Running through pregnancy

November 27th, 2018 by Marie Dershem

By Erin Young


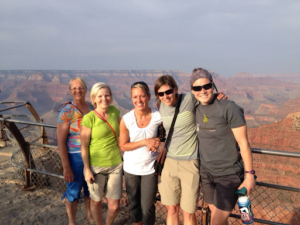
The day before the big Rim to Rim to Rim run and totally oblivious that I was already a few weeks along.

I found myself relentlessly tired from weeks of epic running. I had flown out to Yosemite that spring break, to poke around and then over to Lake Sonoma only to be humbled by 50 miles of relentless “hills”. Two weeks later I ran (my face off!) at the Ice Age 50 miler in Wisconsin, gunning for top 10 in hopes of a ticket to the “big dance”. Just two weeks after that, my girlfriends and I took off for our dream adventure trip to the Grand Canyon for the 53 mile rim to rim to rim adventure to be covered in just one day. I played hard. I was living with no regrets, saying yes to everything. That all came to an abrupt end when I just couldn’t kick the fatigue. I was just SO tired. After weeks of rest and still whining, “I am SO tired”, my best work buddy slapped me with the ridiculous suggestion that I try a pregnancy test. I laughed in a way that now just seems so cocky. When she found me crying behind my desk, she knew she was right. And just for the record, those were tears of fear, not regret. Never regret. Fear because I knew that life as I knew it, was over. But life wasn’t over. This was great. I was going to have a little buddy to be part of all of these adventures! But running through a pregnancy isn’t easy. I found ways to make it tolerable, and even enjoyable. These are my suggestions for keeping it going and even making the actual birth far easier!


  • Don’t stop running! As soon as you find out you are expecting, make your plan to keep it going. Once you are out of shape, getting back is far more difficult during pregnancy. Be reasonable and make your goal to maintain fitness rather than gain. There has never been a better time to focus on building your aerobic base.


  • Remember that heart Rate will be elevated and you will breath heavier, even if you haven’t gained a pound yet. Blood volume doubles before the end of the 1st trimester, causing your heart to work harder


  • Don’t worry about going above a certain heart rate. It is a myth. You can run hard and race as long as you feel up to it. You will cut off your own oxygen supply before you ever take away from the baby. Trust me, I had an OB researcher to back me up on that one and I raced all the way through pregnancy!


  • Running in the heat is going to feel way more difficult. You will get hotter faster. I suggest early morning or treadmill runs in the air conditioning. Always carry ice cold water, or ground up ice with water. It will help you feel cooler.
  • Invest in a “belly belt”. They will help you run longer into pregnancy and give your belly and lower back support. I also continued to use it for several months after I had my son. This is a must!! Belly Belt This is similar to the one I got, there are many choices on Amazon. Don’t bother with the cheap ones as there is little support.


  • The Hoka’s sure are ugly, but they are the greatest pregnancy run shoe ever! Just look at all that cushion!


  • Running dirt trails felt so good compared to the road. Plus it is usually shaded and not as many people around to witness your walk breaks!


  • Have a running buddy! It helps so much to have a friend to motivate you. Some days were so difficult to roll out of bed. Having my friends waiting for me (sometimes in my driveway!) got me moving every morning before work. I was lucky enough to have a few who could tolerate my dropping pace. And when I was too slow, we ran on treadmills next to each other!


  • Strength train! You don’t have to do box squats, but 2-3 times a week in the weight room will maintain your some of your strength and make recovery easier. Plus, you won’t feel so terrible with the added baby fat that you WILL have during pregnancy.


Run as much as you want as long as you are comfortable. You know you better than anyone. The day my back and pelvis started hurting I halted to a walk and my son came that evening. I have no regrets about running during pregnancy. It was difficult, but making it social made it enjoyable and helped me feel more like myself. I realized that I wasn’t giving up my identity, but it was enhanced.


Now, running after the baby comes is a whole other story! The good news is that pushing the baby jogger really IS easier than having one in your belly!

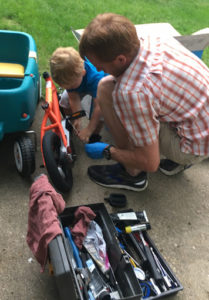
My little buddy building his 1st two wheel bike

The post Running through pregnancy appeared first on Team Athletic Mentors.